


INSTALLATION INSTRUCTIONS
When you receive your order from AeroGraphics it will consist of three layers. The top layer is a spacing tape. The purpose of this layer is to keep your graphics properly spaced until the final product is firmly adhered to the surface. Once your decal is applied, this layer will be pulled away to reveal the decal. The second layer is the actual decal. Finally, the third layer will consist of either wax paper or plastic. This paper protects the adhesive on the decal from foreign materials until it is applied.
CLICK HERE TO VIEW THIS DOCUMENT FULL SCREEN
Above, you will notice both wet and dry application instructions. Though both methods are capable of creating a quality final product, each has advantages and disadvantages over the other. We at AeroGraphics feel that you should always use the method which is most comfortable to you. If you feel that you would like help deciding which method will work best for you, give us a call at 1-800-336-9633. To help you decide which method is best for you, here are the main differences:
|
Wet Application Advantages: Wet application is usually better for larger decals. The wet solution temporarily inhibits the decal's ability to fully adhere to the surface allowing you to lift and move the decal. Also, air can travel under the decal easier which helps deter bubbles. This will allow you time to work with the material on every type of installation. Disadvantages: When you are removing the spacing tape after the decal has been applied, care is needed to refrain from pulling the decal off the surface. Also, please do not wash the area of the applied decal for a few days until the application solution has had time to fully dry and the adhesive can properly stick to the surface. |
Dry Application Advantages: Dry application is recommended for small lettering and decals. When using the dry method, permanence of the decal is immediate. Therefore, there is a better adhesion of the decal to the surface for pulling off the spacing tape. This makes it easier to pull the protective tape away from small and detailed designs. Disadvantages: There are no second chances with the dry method. Once your decal has been pressed to the surface, there is no way to remove the decal without damaging it. This means that more care must be taken in the placement and application to ensure that your decal is straight and free of bubbles. |
SOME THINGS TO CONSIDER WHEN
APPLYING VINYL DECALS:
The adhesive is sensitive to temperature: If it is too cold, the adhesive will not be soft enough to properly bond with the surface and extra care will be needed when removing the spacing tape. Once the temperature increases, the adhesive will properly cling to the surface without adverse affects. Please try to apply your decals when the temperature is above 60 degrees Fahrenheit.
Don't Install the decals in Direct Sunlight: Even on a cold day, direct sunlight will make the adhesive much more aggresive. It is best to apply the decals in a shaded area. If you are applying your decal using a wet method, make sure your solution does not evaporate before you are finished. If necessary rewet the surface and decal.
Large decals can be a lot for one person to handle: Having someone help you hold the decal can be a life saver. This will allow you to focus your attention on pressing the decal to the surface without bubbles. Also, if your decal has separations (Like spaces between letters), you may cut your decal apart for smaller, more manageable pieces. This should only be done after the decal is temporarily in place with masking tape to maintain proper spaces.
Don't stress over a few bubbles: Smaller bubbles will disappear through time due to barometric changes. If the bubbles don't go away by them selves, you can always pop them later with a pin to let the air escape. To accomplish this, simply puncture the bubble with a pin, then push the air towards the puncture with your fingers.
If you have additional questions, please call us!
We are more than happy to guide you through the application process.
HOURS OF OPERATION:
Monday thru Friday
8:30 a.m. - 5:00 p.m.
Mountain Standard Time (MST)
Some Pictures From Our Satisfied Customers!
(CLICK ON IMAGES FOR LARGER VIEW)

Bob Freeman, CO
Free Man Airshows
(Extra 330SX)
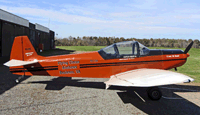
Chris Edwards, VA
(Piel Emeraude CP-305)
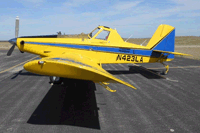
Painted By:
Day Aircraft Refinishers
(Air Tractor AT402A)

Aerospace Museum of California
(North American F-86 Sabre)
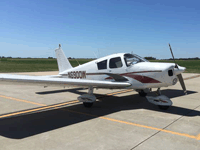
John Kinter, IA
(Piper PA-28 Cherokee)
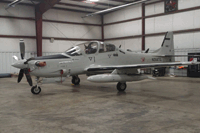
Tactical Air Support, Inc.
(Embraer Super Tocano)
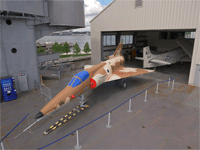
Intrepid Sea, Air and Space
Museum, NY
(IAI Kfir)
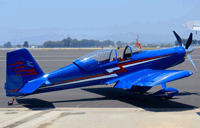
Mark Swaney, CA
Painted By:
Ray's Aviation
(Team Rocket F1)
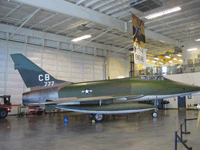
Aerospace Museum of California
(F-100D Super Sabre)